Pin It button on image hover
Showing posts with label Small Graph Paper. Show all posts

Monday, 29 August 2022

Inky Inspiration by Natalie

So, this blog piece is actually three in one; August has been a mad month in both good and bad ways. Here, are my three projects all in one go for this month's blog.

Inky Background 1

This project is all about cartridge paper, which often gets overlooked in our stamping. It is a great way of adding layers without bulk, and is much easier to fussy cut.

Start with an A6 piece of cartridge paper, ink up with Saltwater Taffy Distress Ink and Weathered wood using a large blending brush. The paper is easily saturated so allow it to dry completely naturally. Once dry, tear it into two at roughly a third of the way down. Adhere to a piece of stiff card with a gap between the pieces. Trim this to a tag shape. Again, allow any wetness to dry and then brush around edges with more Saltwater Taffy.

Onto another piece of cartridge paper stamp two butterflies and flower bud, using Prize Ribbon Archival ink; such as these from Harebell Butterfly. Add a touch of watercolour using Saltwater Taffy squeezed onto your glass mat to your butterflies. Set aside to dry. Onto the next piece of cartridge paper, stamp the diamond background pattern using Weathered Wood. Tear a small strip to form the top section of your tag.

Adhere the diamond background piece to your tag. Next, ink up a couple more stems with Prize Ribbon Distress Ink and spritz with a light coating of water for an instant watercolour look. Stamp onto your tag directly and allow to dry. You can also add a smaller stem in Saltwater Taffy.

Going back to your Prize Ribbon Archival ink, stamp the herringbone ribbon from Making more Marks at the centre top of the tag and at the bottom left hand edge. The cotton thread stamp from the same collection looks great stamped in Saltwater Taffy as a finishing touch to your stamping. Add a pink toned eyelet to finish your tag.

Optional: Adhere your tag to your card, doodling a thread for it to hang on either vertically or horizontally. I used a blue fineliner to complement the colours used in the tag. 


Using ink as a guide

This project is all about your ability to write an x. If you are looking for a mindful project, this is the one for you. Grab your coloured pencils, turn on the zen music of your choice and focus on those x's.

Start by stamping the grid image from Small Graph Paper using a brown ink of your choice. You want to get this as clear as possible without looking too perfect. Over the top, stamp the O from O is for... in a pale ink that is just dark enough for you to see the edges of the tree detail.

Next, start by "colouring" in the O with a dark brown pencil drawing an x to every square wholly covered in ink, or use a half stitch, quarter stitch or ¾ stitch around the edges. I found it easier to do the colouring this way round. You then want to use different shades of green to make the tree canopies pop along the a different shade of brown for the trunk. Finish with the green of the hills.

Inky Background 2

This card uses the images from Thistle Butterfly by stamping wet in wet.

Start by creating a splodge background by applying your dye based ink to your glass mat or blending mat. Spray watercolour card with water generously and place into the ink multiple times to pick up colour. To add stronger colour, ink up one of the stamps with the same ink and spritz lightly with water to stamp wet into wet. Allow the colour to bleed into the still wet background by holding slightly longer in the stamp.

Heat dry and stamp with the same ink using the dandelion image in green archival ink around the outside. Add watercolour to the buds of the dandelions and a little warm yellow to the tips. Stamp your main image the same way and colour with the same ink as your background to make the image feel like a field of the same plant.

Mount to a white card base and create a border around with a fineliner. Stamp your sentiment onto a spare piece of card. Trim and add a border of green card. Adhere your sentiment and voila!
 

Friday, 26 August 2022

Different Backgrounds by Sandra

Hello, I am sharing the last of my cards from the July shows on Create and Craft.

These two cards feature stamps from Butterfly Daisy Collage and I have used a couple of different background techniques.


For my first card I used a "mop up" piece of card which I had used Distress Inks and a harlequin stencil on. A great way to use up those pieces you have been saving!  I stamped the main image from the stamp set in archival ink and then used a die to cut it out. On a larger piece of card I used one of the smaller stamps to fill around the sides. I also used Small Graph Paper to fill any gaps. I then mat and layered these onto a 6x4 card base.


For my second card I used Distress Inks randomly over a DL sized card and dried it with my heat gun. I then stamped some flowers and butterfly from the stamp set in VersaMark ink and clear embossing powder. I then covered everything with black Distress Ink and wiped it off to reveal where the embossing powder acted as a resist. I finished by running it through an embossing folder with  a branch effect and highlighting with gold wax. I trimmed it down and mat and layered in gold and then onto a DL card base.


 Thanks for looking

Sandra x

Tuesday, 23 August 2022

A Touch of Pink (by Judith)

Hello everyone, I hope that you are keeping well. I have a project to share with you today showcasing some of the products featured on last month's TV shows on Create and Craft. 

To create my project, I started with one of the fabulous black and white papers designed by Lesley. I attached this to a MDF panel using matte medium. I stamped the large flourish from Butterfly Daisy Collage in two of the corners, and added the Small Graph Paper randomly stamped using a pink Versafine Clair ink. I just used parts of the stamp to give a patchy effect, and used the stamp held in my hand, rather than on a block. I added Distress Ink around the edges with a blending brush.

I stamped and embossed the Freedom Flower twice onto a spare piece of the black and white paper and cut it out. I coloured the image with shimmer paints, before decoupaging the flower and attaching it to the background. I used a grey pencil around some of the petals to give the impression of extra layers, adding shading for more depth.

Thanks for stopping by, Take care,


Judith xx


Sunday, 14 August 2022

graphs (by Veronica)

Good morning everyone, I hope that you are all not melting in the heat at the moment - as far as I am concerned, it's a close run thing!

Two more samples from last month's tv shows today , this time using the Small graph  paper stamp as the main image. I have to admit to a feeling of relief when others also went a bit wild!

The first one just has the graph part of the stamp stamped in black in the centre of a 5.5" square white card. The letters from Just Useful  and the scribble from Make More Marks also stamped in black, and the squares from Make More Marks stamped in red. I also filled in some of the scribble loops with a fine line pen.


 For the second card most of the graph stamp was stamped in blue ink, with the line from Making More Marks in green to make the graph line. The A from Just useful in black, and then a sentiment from Words of Comfort and Cheer added in black to finish

Monday, 8 August 2022

F is for Fabulous by Doreen

F is for Fabulous

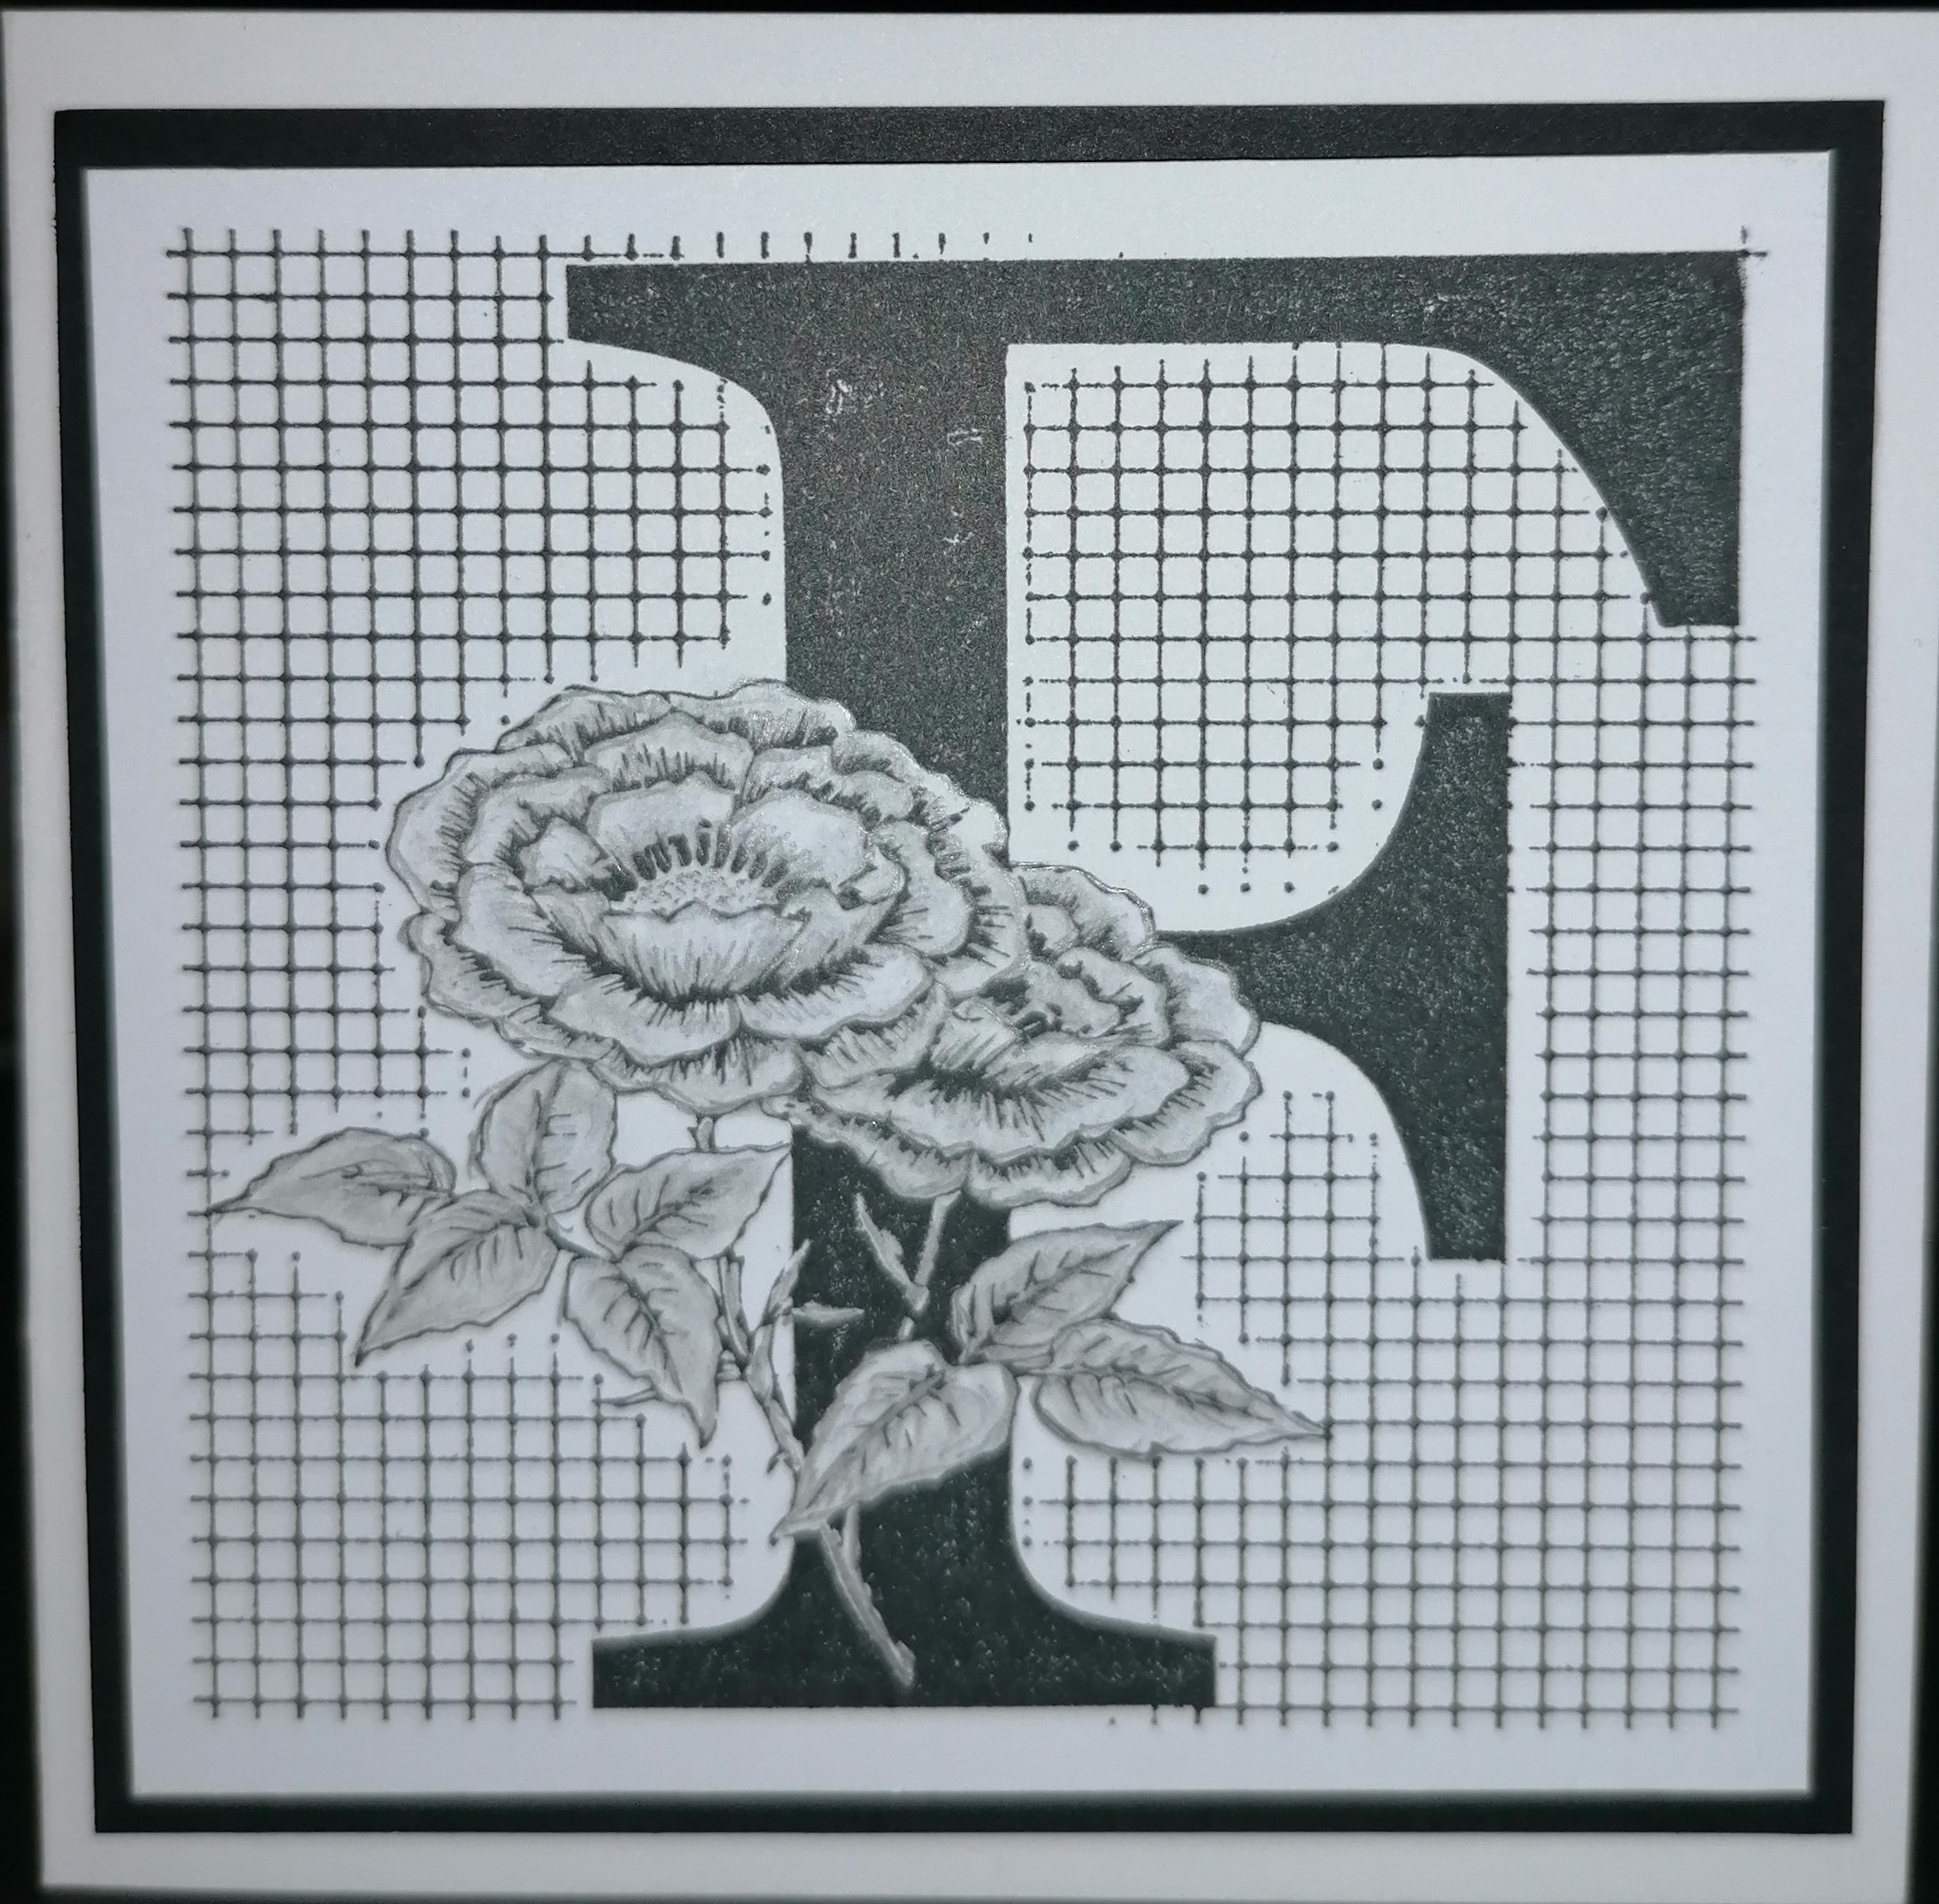
Well hello everyone and welcome to August a little late I know but better late than never. Today I would like to share a card with you that uses the F is for.... and the Small Graph Paper stamp set.


Firstly using Masking Tissue stamp in Versafine Clair Nocturne and cut out the image, then using the stamp again stamp onto a piece of card ensuring it is larger than necessary so as it can be cut to size later.

I heat set my image simply because of impatience and then cover with the mask, then take the Small Graph Paper stamp the image over the top of the masked area. Cut the card to size leaving a little border around the F is for and Small Graph Paper.  To add some depth to the image I used a graphite pencil. Then apply to the Black Card.

Once card has been mounted I decorated the envelope with a stamp of random dots and the word from the F is for .... set


Thank you for looking in today 

Love Doreen


Friday, 5 August 2022

Monochrome With A Red Heart


These are some samples from the July's shows, there were lots of gorgeous stamps to use.  So for my first one I started by stamping out the graph paper as I wasn't quite sure what I was going to do, I stampede it twice and thought what is graph paper used for then I thought the paper for Heart Monitor machines and so I went on to draw the heart beat line and added in a hearts.  I matted and layered them adding a sentiment to it from Birthday Words , would have made a good Valentines card.


For my second creation we are Monochrome again, utilising the corners from the Butterfly Daisy Collage set,   So I stamped one of the corners and embossed it forming a square, out of the same set I stamped out the butterflies twice and fussy cut them.  I added them to two of the corners then added a sentiment from the Birthday Words set in the centre.

I will see you again towards the middle of the month for some more samples.

Happy crafting

Tracy x

Monday, 1 August 2022

A Pop of Colour (by Judith)

Hello everyone, I hope that you are keeping well. I have a project to share with you showcasing stamps from last month's TV shows on Create and Craft. This was one of the demos that I created on the show, and I really enjoyed putting this project together.

I started my card by colouring a piece of Drawing Cartridge with Distress Oxide Ink, I chose a blue and green ink. I placed it onto a craft mat, and spritzed some water onto the ink, before placing the Drawing Cartridge over the top. I dried the Drawing Cartridge, and then patted it onto the mat again, to pick up some of the left over ink. I dried the Drawing Cartridge once more and continued with the background.

I added some stencilling using orange ink. I also stamped the Small Graph Paper stamp using green Versafine Clair ink, simply holding the stamp in my hand, not on a block. This gave me the opportunity to use random parts of the stamp by curving the stamp, so that only a portion of the stamp touched the background. I used a definition from the F is for... stamp set to complete the background.

I stamped and embossed some flowers and a butterfly from the Butterfly Daisy Collage stamp set onto some patterned paper. I coloured the images with pencils and cut them out. I used the large flourish, and stamped the ends on the background, working out roughly where they needed to go by placing my flowers down first without adhering them. I stamped the butterfly antennae where I wanted to place the butterly on the background before I stuck the butterfly to the background. I curved the flower petals with my hands, but you could use a pencil or scissors to do this. I attached them to the card in between the flourish ends, and added some black buttons in the centres. I matted the background onto black card for extra drama to finish.

I will be back later in the month with more projects to share with you, thanks so much for stopping by.

Take care,


Judith xxx


Sunday, 12 December 2021

Beautiful Trees (by Sandra)

 Hello, I'm sharing some more of my cards from the November show on the Craft Store.

My first card uses Trees a Crowd. I started with a 18cm piece of card and using a stencil I blended Distress Oxides to create my background scene and moon. I spritzed the background with some water and blotted it to give me a snowy effect. I added some sparkle to the moon, but unfortunately it doesn't show on the photo. I then stamped the main bare tree stamp 3 times at different heights. I stamped out a sentiment and mat and layered my pieces onto a 20cm card base,


For my next card I used a roller to apply Versafine Clair ink to my Inky Plate. I cut a strip of card that was as wide as my card base, but narrower and pulled the print. I then used a scrap of copy paper to make a hill and applied ink with a blending brush. I stamped the trees in Archival ink and adhered to my card base. I added the sentiment which was stamped onto a piece of card with a torn edge.


My next card uses the Harmony Tree, Small Graph Paper and Artist Trading Heart stamp sets.

I started by stamping the heart onto a piece of card and masking off the outside. I blended Distress Inks to make my background and then stamped the tree. I used colouring pencils for the tree. I removed the mask and added the chain  as a hanger and added a shadow on the edge of the heart. I finished by adding the sentiment and layering onto a 15cm card base.


My last card today uses the Remembrance Tree stamp set. I used a small piece of watercolour card stock and sprinkled with Brushos which I then sprayed with water. Amazes me every time! Once it was dry I stamped the tree in the lower part and added the words from Remembrance Tree and Harmony Tree.  


Thanks for looking

Sandra x

Wednesday, 1 December 2021

Happy December (by Judith)

Hello everyone, I hope you are keeping well. Many of you have been experiencing the cold weather lately, and it really feels like Winter has set in, doesn't it? I have just come back from a trip to Mexico, where it was lovely and warm, and the sunshine was very uplifting. I wanted to share a feeling of that sunshine with you with the colours that I have used in some of my projects today. I cannot promise to make you feel any warmer, but perhaps the cheery colours will brighten your day.

My first project was created by blending some Distress Ink onto a piece of Drawing Cartridge. I chose shades of blue and yellow throughout the whole project for continuity. I added some stencilling and stamped segments of the Small Graph Paper stamp using the stamp in my hand, not on an acrylic block, so that I could curve the stamp, to get smaller sections on the background. I also stamped the butterfly definition from the Happy Flower's Day stamp set on the background.

I stamped the large butterfly from the same stamp set first onto the background twice, and then again onto a piece of spare smooth white card. I coloured the images on the spare card using pencils, cut them out, and attached them to the background.

For my second project, I chose a piece of patterned paper and stamped the magnolia from Happy Flower's Day twice, masking the image as I went along. I added the flower definition and the main sentiment in the background. I coloured the image with pencils. I attached the panel to a chipboard panel using matte medium. When the adhesive was dry, I sanded the edges to give a white edge. 

My third project was created by placing Distress Oxides onto a craft mat and spritzing them with water. I placed the Drawing Cartridge onto the mat and picked up the colour. I used a whiteboard heart to do the same with the remaining colour on the craft mat, giving a paler version.

I stamped the flower definition over the background, and the fritillary flower and sentiment onto the heart. I picked up a bit of the Distress Oxide colour from the craft mat and painted the flower with a water brush.

For my final project, I chose to use grey card for a completely different look. I stamped the floral sprig from A Heart Full of Love around the edge of the background, and then added the floral heart in the middle. I coloured the images with pencils. I used white pencil first on the flowers, and added the other colours afterwards, this really helps on darker coloured card.

It's actually my Birthday today, and I would like to wish you all the best of days today. I will be back later in the month with more projects to share with you, take care, and thanks for stopping by,

Judith xx

Friday, 9 April 2021

Smiling by Brenda


Good morning, hope everyone is OK and had a good Easter. 

Today I am sharing some of my samplesd from last months Hochanda shows. Starting with the top creation using the beautiful Floribunda Net which I stamped onto an inky Oxide background and bleached out the colour from the blooms. Using gesso as an 'ink' I stamped some circles from Just Useful and numbers from Small Graph. On a panel across the bottom I used one of the images from Life is so much Better which was launched on the show. They are my own and first set of inspirational quotes and I'm still a bit taken back that Lesley and David wanted to make them into a stamp set, thank you both 😊


Following the current trend of long tall cards I used Garden Lace Scene which fits this style so well. After stamping the image I added colour and mated with coordinating colours. The sentiment is another from Life is so much Better.

As always my thanks for popping in today.

Monday, 19 October 2020

Alliums and Lights

Hello I'm sharing a couple more cards from the Hochanda show in September featuring the 2nd series of Blueprint stamps.

My first card uses the single Allium flower from the Allium Blueprint set.

First, I stamped the Allium onto some Masking Tissue and cut out the image as close as I could.
I coloured a piece of card with a water colour wash.
I then stamped onto the centre of  my card and used the mask to cover it.
I then stamped each side of the masked flower ensuring that the stems were at the right angle for a vase.
I removed the mask and coloured the flowers with water colour pencils. I then added the vase which I cut from some patterned paper.
I finished with a label from the stamp set, and layered onto a card


For my second card I used Distress Inks to make the background.

I stamped the lightbulbs from the Lupin Blueprint set with Versafine and I stamped an extra one onto a piece of card with Versafine which I then embossed with clear powder.

I coloured this one in, again with Distress Ink. I used a ball tool to shape the edges and added some foam pads to the back to give a bit of depth. I glued around the edge of the lightbulb and placed it on the card. I used the chain stamp from Small Graph Paper set to "hang" the lightbulbs.


Thanks for looking

Sandra x

Saturday, 20 June 2020

F is for..........by Brenda


Good morning everyone, today I have a couple of shares and the first at the top features F is For....... stamped in Versafine Clair onto a shaving foam background and some colour added to the flowers I have also used one of the worker stamps from Small Graph Paper to create a border and added some splats using another worker stamp this time from Butterfly Mind.


Here I have one of the MDF tags which I coloured with Distress Oxides, then stamped flowers from Doodle Birds in Versafine Clair, added some Butterflies from Just Butterflies  and the sentiment from has been stamped onto some Aida embroidery fabric.

Thanks as always for popping in today.

Sunday, 17 May 2020

Map of Happiness and A Blue Print by Penny

Morning peeps, I hope this one finds you all fit and well.  Today it's my turn to try and inspire you with a couple of my samples from last months tv shows.  

Map of Happiness.


For this card I have used stamps from the Wild Cornflower Blueprint, Make Your Mark, Haberdashery and Small Graph Paper sets; Distress Inks, sepia Versafine ink, and a stencil.


I took a piece of Drawing Cartridge  and stamped several images with Versafine ink,  I wanted to create a card with a masculine feel.  I used Distress ink to watercolour the images, stamped a sentiment then added ink around the edges of the card.


 On a piece of Kraft card I stamped the graph paper image and matted the focal panel onto it.  I  took a white base card and used DI through a stencil to colour it, then I attached the focal panel to the base card.  To complete the design I added a couple of images from the Make Your Mark set.


A Blue Print.

This time I have used stamps from the Wild Cornflower Blueprint set; black Versafine ink, watercolour pencils and a colour spray from my stash.


I took a piece of Drawing Cartridge and stamped a couple of images in Versafine ink.  I then masked the images and spritzed blue ink to create the background.  I removed the masks and watercoloured the images.


 I added a sentiment and blended ink around the edges before matting the panel onto blue card and attaching it to a white base card.


Thank you for dropping by today I hope you've enjoyed my post.  I'll be back again next month with some more crafty fun to share with you.

Until then take care and stay safe,


                             x x  Penny  x x 

Wednesday, 15 January 2020

Feeling Like Spring (by Pat)

Hello everyone, this month our Guest Design Team member Pat is joining us to inspire you with some creative projects. For her first appearance, she has made a lovely Spring themed card.

Pat writes:

Hi everyone, I'm so pleased to be back with my first of three guest posts for this month. I decided to make us feel as though Spring has arrived, even though it will be a couple of months or so before we feel that Spring is in the air. I am using the Spring Bird Crocus set, Texture Fragments, a small dot stamp from Freedom Flower, the graph stamp from Small Graph Paper and the sentiment from Spring Bird Tulip set. Also Distress Inks- three greens, a lilac, purple and two yellows, clear gloss embossing powder, a waterbrush, a blending tool, and permanent purple and white pearlescent ink.

I stamped the smaller crocus image and the little flower border four times onto a 4" square piece of white card using the purple permanent ink and heat embossed with clear gloss embossing powder. I coloured the flowers using a waterbrush and the Distress Inks mentioned above, and applied the dots around the edge using the purple and some white pearlescent ink. 

I then made the background using the same Distress Inks and stamped one of the Texture Fragment stamps, then the little dots, and finally the graph paper stamp. I also blended more of the purple around the edges. I finished with a sentiment stamped with the permanent ink and heat embossed again with the clear gloss embossing powder. I used a stitched tag die and the sentiment from the Spring Bird Tulip set, and then blended more of the lilac and purple Distress Inks around the edges.


That's all from me for now but I'll be back again next week.

Best Wishes,

Pat.

Sunday, 29 December 2019

Reflections by Brenda


Good morning, Brenda here with some more samples from last month's Hochanda shows.

My top card features Remembrance Tree with a Pan Pastel background, stencils and Distress Inks used to build up the scene and then the Tree stamped with Versafine Black and a reflection in the water and sentiment from the Harmony Tree set.


Here we have a Brusho background over-stamped with Small Graph Paper and then using Verafine black I stamped 'O' is for just as laid out on the set before cutting into separate stamps. I used my stamp platform to allow several inking to achieve a sold finish.


This is one of the Whiteboard Trading Hearts and inked with Distress Oxides, then stamped first with the grids from Small Graph Paper using a blue Versafine Clair ink, then Freedom Flower using with Versafine Clair, added some splatters around the edge using one of the worker stamps from the same set and highlighted with a white gel pen. The word is from 'F' is For, stamped onto vellum using the same ink and heat embossed with detail clear EP.


Yet more Distress Oxides and then the large image from Butterfly Mind stamped in Versafine Clair and texture paste and a stencil used to add sections of script. I also used the splatter stamp from Freedom Flower to add more interest and sentiment from the Butterfly set. I then stamped the Butterflies again onto vellum using Versamark, heat embossed with white EP, cut out, decoupaged and added wire antenna.


The background for this one was a leftover piece using Alcohol Inks and I simple stamped Harmony Tree and the sentiment with Versafine black and heat embossed with detail clear EP to prevent smudging as the base piece is a gloss coated card.

As always I appreciate your visits and words of encouragement.


Saturday, 28 December 2019

Butterflies.....

Hello
I am sharing some more of my cards from the November Hochanda show.

For my first card I created a watercolour panel by pressing three of my Distress Inks onto an acrylic block and spritzing with water. This was then placed onto my card stock and lifted, leaving the lovely pattern behind. I then stamped the individual butterflies  and sentiment from the Butterfly Mind stamp set.


My next card features the butterflies and filmstrip from the same set. I used Brushos to create a soft back ground.

This card uses the large butterfly, the separate film strip, a sentiment and the large splatters.

As you can see these are three quite different cards from the same stamp set.


My last piece is an art journal page using the Freedom Flower  and Small Graph Paper Chocolate Blocks
Thanks for looking
Sandra xx

Friday, 27 December 2019

Faux Stitching and Tree Landscapes (by Julie)


Hello, hope you all enjoyed your Christmas celebrations. I have a selection of cards to show today that I made for Chocolate Baroque's November, Hochanda TV shows.


My first is a DL card stamped with the Small Graph Paper design. There is a chain link design that comes with the stamp set and I used it to make the stitched design on top of the graph paper image. The back ground has been coloured with Distress ink and the distress stamp is from Freedom Flower.
The sentiments are from Journal Today


Following on the theme of stitching, I decided to make the small graph paper stamp look like a cross stitch design by stamping the flower from Freedom Flower over the top. I then mounted it onto some frayed burlap fabric. The background has been coloured with Distress inks and over stamped with the distress stamp from Freedom Flower. The sewing images are from Haberdashery
I finished the design off by colouring in the squares on the thin strip of graph paper from Freedom Flower to form Happy Birthday, much like you would on a cross stitch design.


This tree design is on the reverse of a recycled hanging ornament that I bought from my local supermarket. I stamped the tree from Remembrance Tree and the small tree from O is for... using an oil based dye ink that dries permanent. I then applied texture paste with a pallet knife to form the hills and when it was dry I coloured with Distress inks and gilding waxes. I made a mask for the sun/moon before colouring the background with Distress inks. I sealed the picture with a glitter spray varnish.


My last card is stamped with O is for.... The main central image was stamped with a blue, dye based ink and coloured with polychromos pencils. The background has then been stamped with the small tree that comes in the set and the edge was stamped with the distress stamp from Freedom Flower.

Thanks for stopping by and please call back soon for more Design Team inspiration.

Julie xx